
Authenticate Shopify Customers with Auth0
What better way to follow up from the last two posts by combining the concepts. In "This week at BlueBolt", I present my solution for utilizing Auth0 to authenticate a user and then pass them back to Shopify utilizing the Multipass feature.

The primary steps involved in this process include:
- Enable Multipass on Shopify account
- Create an Auth0 Application
- Add Auth0 rule to create Multipass token and redirect user
- Update Shopify Theme with Auth0 Links
- Add URL Values
- Optional: Capture First & Last Name During Signup
This post was updated on 2020-01-31, adding a return_to URL to redirect the user to after being authenticated by Shopify.
Prerequisites
Similar to how TalentLMS requires an upgraded subscription in order to utilize SSO, Shopify requires a Shopify Plus storefront. As a Shopify Partner, you can create development stores to test out any functionality you need to implement on a Plus store.
An Auth0 account is also required. Their free tier includes everything necessary, but even if it didn't, a newly created instance includes all paid features for a few weeks to get you started.
Enable Multipass on Shopify account
Log into the Shopify store, go to the Settings page and click into the Checkout window. Customer accounts need to be either optional or required. This will allow you to enable Multipass for the store.
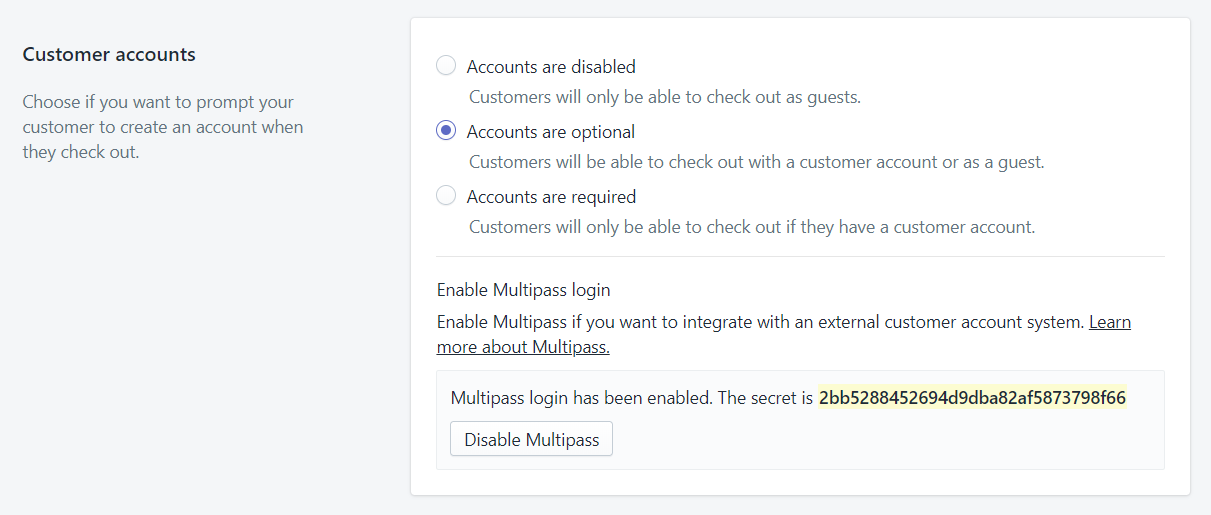
This Multipass secret will be used by the encryption routine to create a cipher that Shopify will be able to decrypt and verify that a Multipass request is legitimate. If you ever suspect that your Multipass key has been compromised, then Disable and re-Enable Multipass. This will generate a new secret key which you will need to copy into Auth0.
Create an Auth0 Application
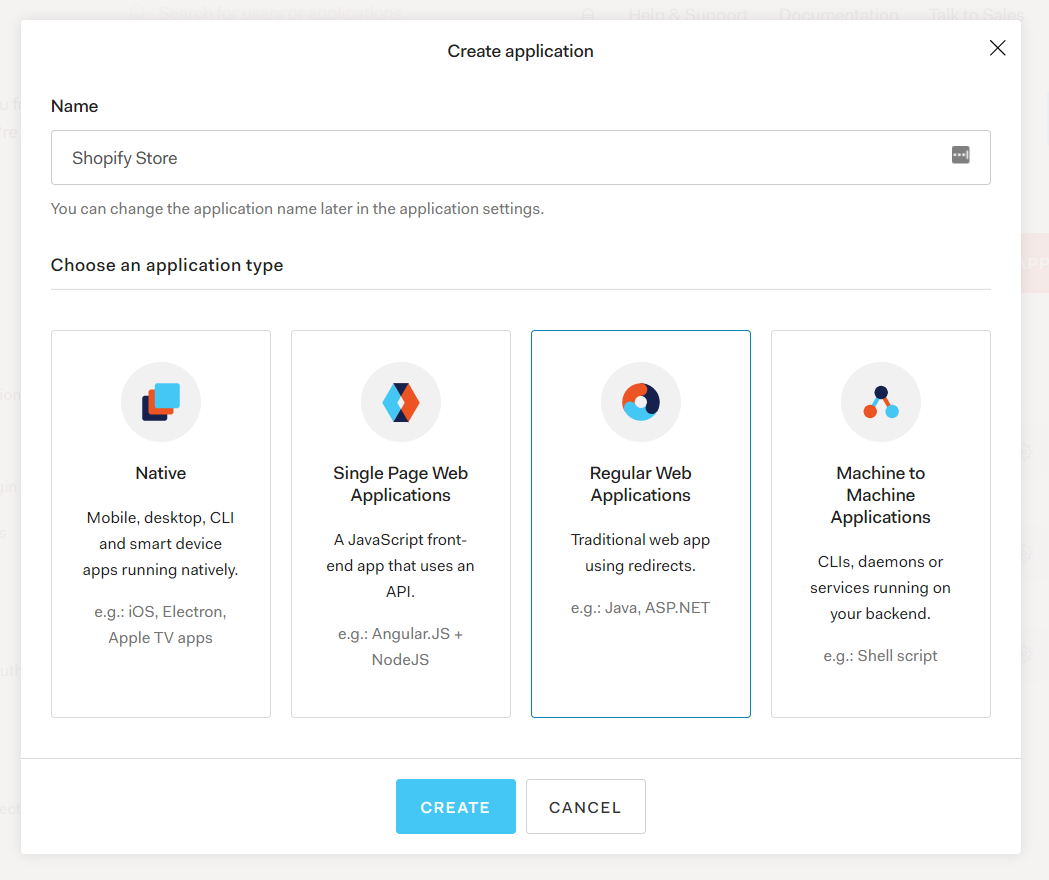
Within the Auth0 dashboard, go to Applications, click Create Application, given it a name (like "Shopify Store" - this is publicly visible!) and choose the Regular Web Application.
Skip the Quick Start; go to Settings.
For the following sections, you need to substitute {shopify-domain} with the domain of your particular store (ex: sample-store.myshopify.com)
- Allowed Callback URLs:
https://{shopify-domain}/account - Application Login URI:
https://{shopify-domain}/account/login - Allowed Logout URLs:
https://{shopify-domain}/account/logout
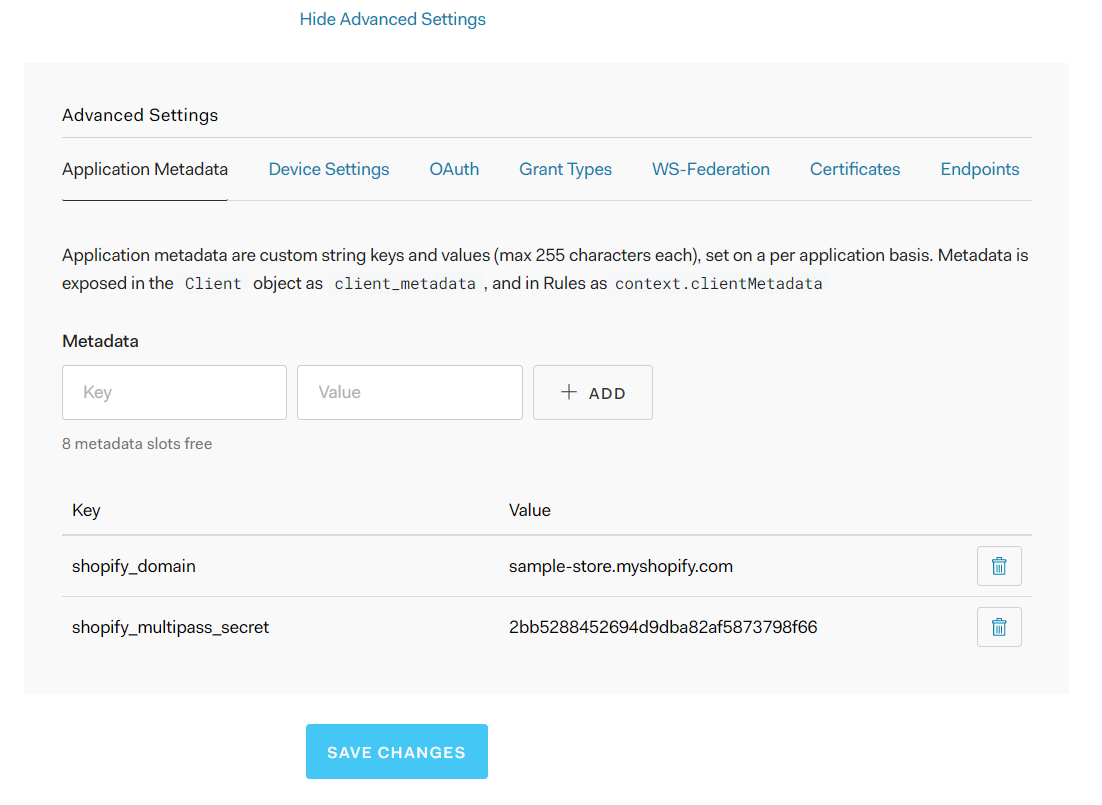
Expand the Advanced Settings section and add these two key/value pairs under Application Metadata:
- Key: shopify_domain; Value:
{shopify-domain} - Key: shopify_multipass_secret; Value
{multipass-secret}
Add Auth0 rule to create Multipass token and redirect user
Now that we have a landing point for the Shopify store to send users to, we need to be able to pass the authenticated user back to the Shopify store. This is where Multipass comes into play.
Start by creating a new Rule in Auth0, use the Empty rule template, give it a descriptive name (like: "Shopify Multipass"), and paste in the following code.
function (user, context, callback) {
  if (context.clientMetadata && context.clientMetadata.shopify_domain && context.clientMetadata.shopify_multipass_secret)
  {
    const RULE_NAME = 'shopify-multipasstoken';
    const CLIENTNAME = context.clientName;
    console.log(`${RULE_NAME} started by ${CLIENTNAME}`);

    const now = (new Date()).toISOString();
    let shopifyToken = {
      email: user.email,
      created_at: now,
      identifier: user.user_id,
      remote_ip: context.request.ip
    };
    if (context.request && context.request.query && context.request.query.return_to){
      shopifyToken.return_to = context.request.query.return_to;
    }

    if (context.user_metadata)
    {
      shopifyToken.first_name = user.user_metadata.given_name;
      shopifyToken.last_name= user.user_metadata.family_name;
    }

    const hash = crypto.createHash("sha256").update(context.clientMetadata.shopify_multipass_secret).digest();
    const encryptionKey = hash.slice(0, 16);
    const signingKey = hash.slice(16, 32);

    const iv = crypto.randomBytes(16);
    const cipher = crypto.createCipheriv('aes-128-cbc', encryptionKey, iv);
    const cipherText = Buffer.concat([iv, cipher.update(JSON.stringify(shopifyToken), 'utf8'), cipher.final()]);

    const signed = crypto.createHmac("SHA256", signingKey).update(cipherText).digest();

    const token = Buffer.concat([cipherText, signed]).toString('base64');
    const urlToken = token.replace(/\+/g, '-').replace(/\//g, '_');

   context.redirect = {
     url: `https://${context.clientMetadata.shopify_domain}/account/login/multipass/${urlToken}`
   };
  }
  return callback(null, user, context);
}
- Line 2: since Auth0 runs all rules for all authentications, we want to restrict this to just when the Auth0 Application has declared the
shopify_domainandshopify_multipass_seceretmetadata. - Line 4-6: Some minor logging, just to verify that the rule is being run.
- Line 8-14: Shopify requires at least the
emailandcreated_atdata points. For added information, we are also passing anidentifier(in case multiple Auth0 accounts have the same email address) andremote_ipto ensure that this Multipass request can only be used by the same computer that sent the initial login request. - Line 15-17: If there is a
return_tovalue in the query string, then add this to the Shopify token. - Line 19-23: In my TalentLMS/Auth0 post, I describe how to grab first/last name when signing up a user. If that is in place, this will also add those data points to the Shopify account.
- Line 25-36: These lines that do the actual encryption were taken from a repository that I found on GitHub, so thanks go to Cory Smith from Calgary, AB for this one.
- Line 38-40: This sets the destination for the authenticated user.
Once this rule runs, the user will be redirected back to the Shopify store. This is important, because if there are any Auth0 rules after this one, they will be completely skipped.
Update Shopify Theme with Auth0 Links
For this example, we are just going to add a link to login into Auth0. If you want to completely replace the Shopify Login process with Auth0, then instead of presenting the user with a login page, you can redirect the user directly to Auth0. As a Proof-of-Concept, though, this will require the user to manually click the link.
Start by editing the current theme (or whatever theme you want to use to test this out).
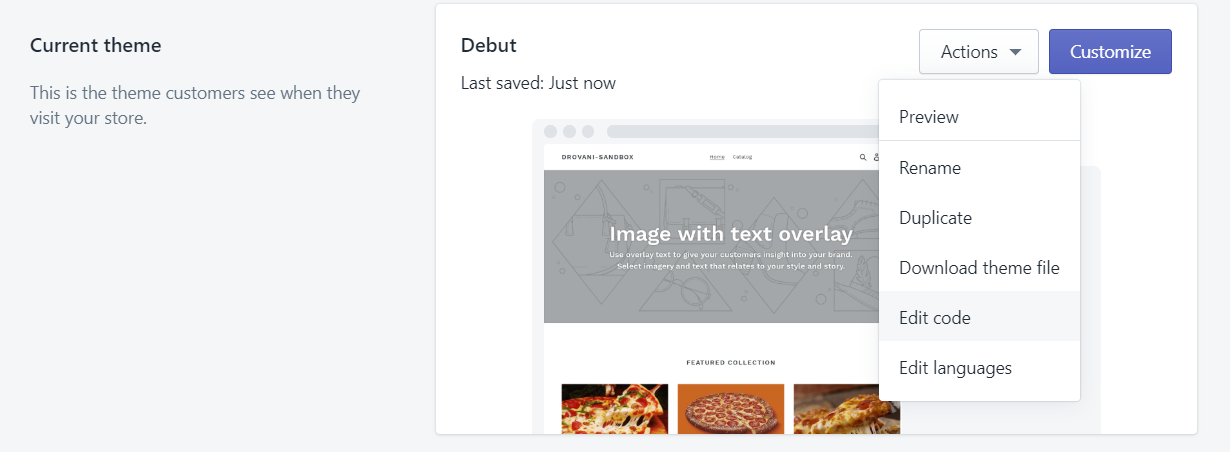
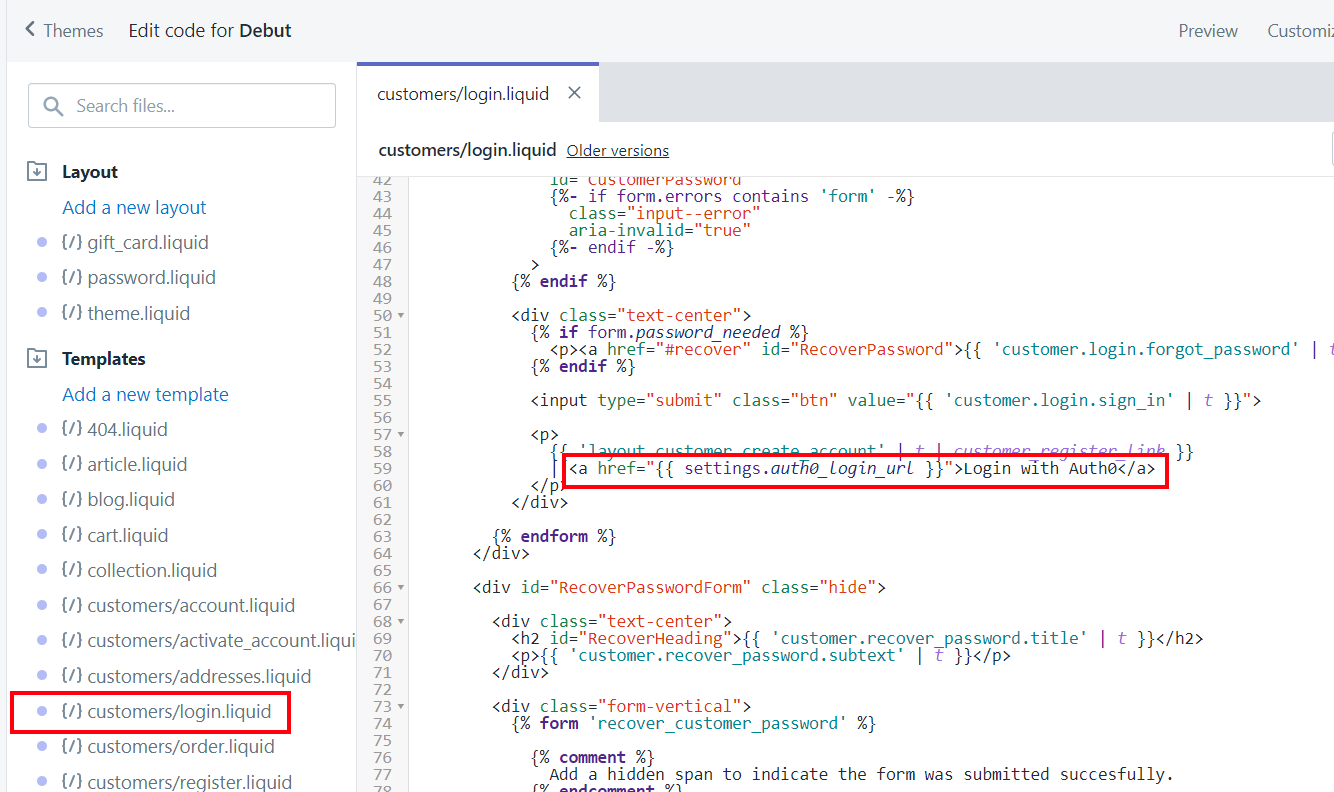
Open the Login page, typically under Templates you will find the customers/login.liquid file. Find a good place to add the link; I put it next to the "Create account" link.
<a href="{{ settings.auth0_login_url }}">Log in with Auth0</a>
You may also want to put a link on the registration page, located in the customers/register.liquid template. If you are completely replacing Shopify logins with Auth0, then this will be another page where you will redirect the user straight to Auth0 instead of requiring them to click on a specific link.
Next up is to replace the logout link with the Auth0 logout. There is a logout link on the account page, found in customers/account.liquid. If your theme has a logout link anywhere else, that will also need to be replaced with the following:
<a href="{{ settings.auth0_logout_url }}">{{ 'layout.customer.log_out' | t }}</a>
Finally, we need to configure the theme settings to allow a user to paste the login and logout urls. Open the settings_schema.json file and paste the following snippet to the end of the array. This will provide an admin user the ability to key in the URL value without having to modify the theme templates directly.
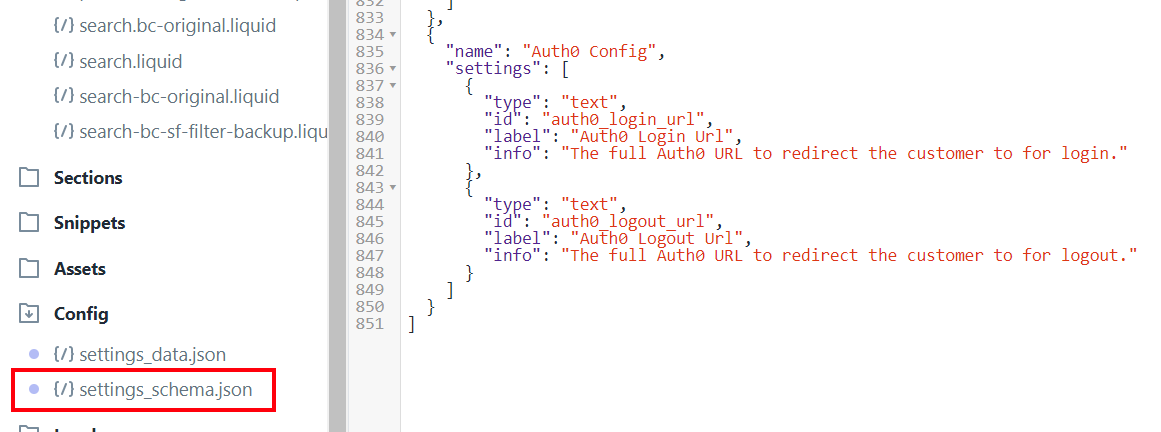
This snippet creates a new settings section called "Auth0 Config" and add the two input that we need. Note that the id property matches the name of the properties we used above for the login and logout links.
{
  "name": "Auth0 Config",
  "settings": [
    {
      "type": "text",
      "id": "auth0_login_url",
      "label": "Auth0 Login Url",
      "info": "The full Auth0 URL to redirect the customer to for login."
    },
    {
      "type": "text",
      "id": "auth0_logout_url",
      "label": "Auth0 Logout Url",
      "info": "The full Auth0 URL to redirect the customer to for logout."
    }
  ]
}
Add URL Values
To put the values for the Auth0 URLs, you can either directly edit the settings_data.json file or you can use the Shopify admin UI. I prefer the UI, because then Shopify handles escaping any necessary characters.
Let's first build the login URL. Go back to Auth0 and copy the Client ID for your application (it's the one created in step 2).

- auth0-instance: the URL for your Auth0 instance.
- clientid: the value from Auth0
- shopify-domain: the domain you want the user sent back to. This must match the Allowed Callback URLs initially specified.
- return-to-path: this can either be set as a hardcoded value (like "account") or it can be dynamically replaced with JavaScript on the page. This is helpful if you want to override the login on the Cart page.
https://{auth0-instance}.auth0.com/authorize?response_type=code&client_id={clientid}&return_to=https://{shopify-domain}/{return-to-path}&scope=SCOPE&state=STATE
The logout URL looks very similar:
- auth0-instance: the URL for your Auth0 instance.
- clientid: the value from Auth0
- shopify-domain: the domain you want the user sent back to. This must match the Allowed Logout URLs initially specified.
https://{auth0-instance}.auth0.com/v2/logout?response_type=code&client_id={clientid}&returnTo=https://{shopify-domain}/account/logout
Back to the Themes page, now click the Customize button, switch to the Theme settings, expand the Auth0 Config section, and paste the URLs from above.
Optional: Capture First & Last Name During Signup
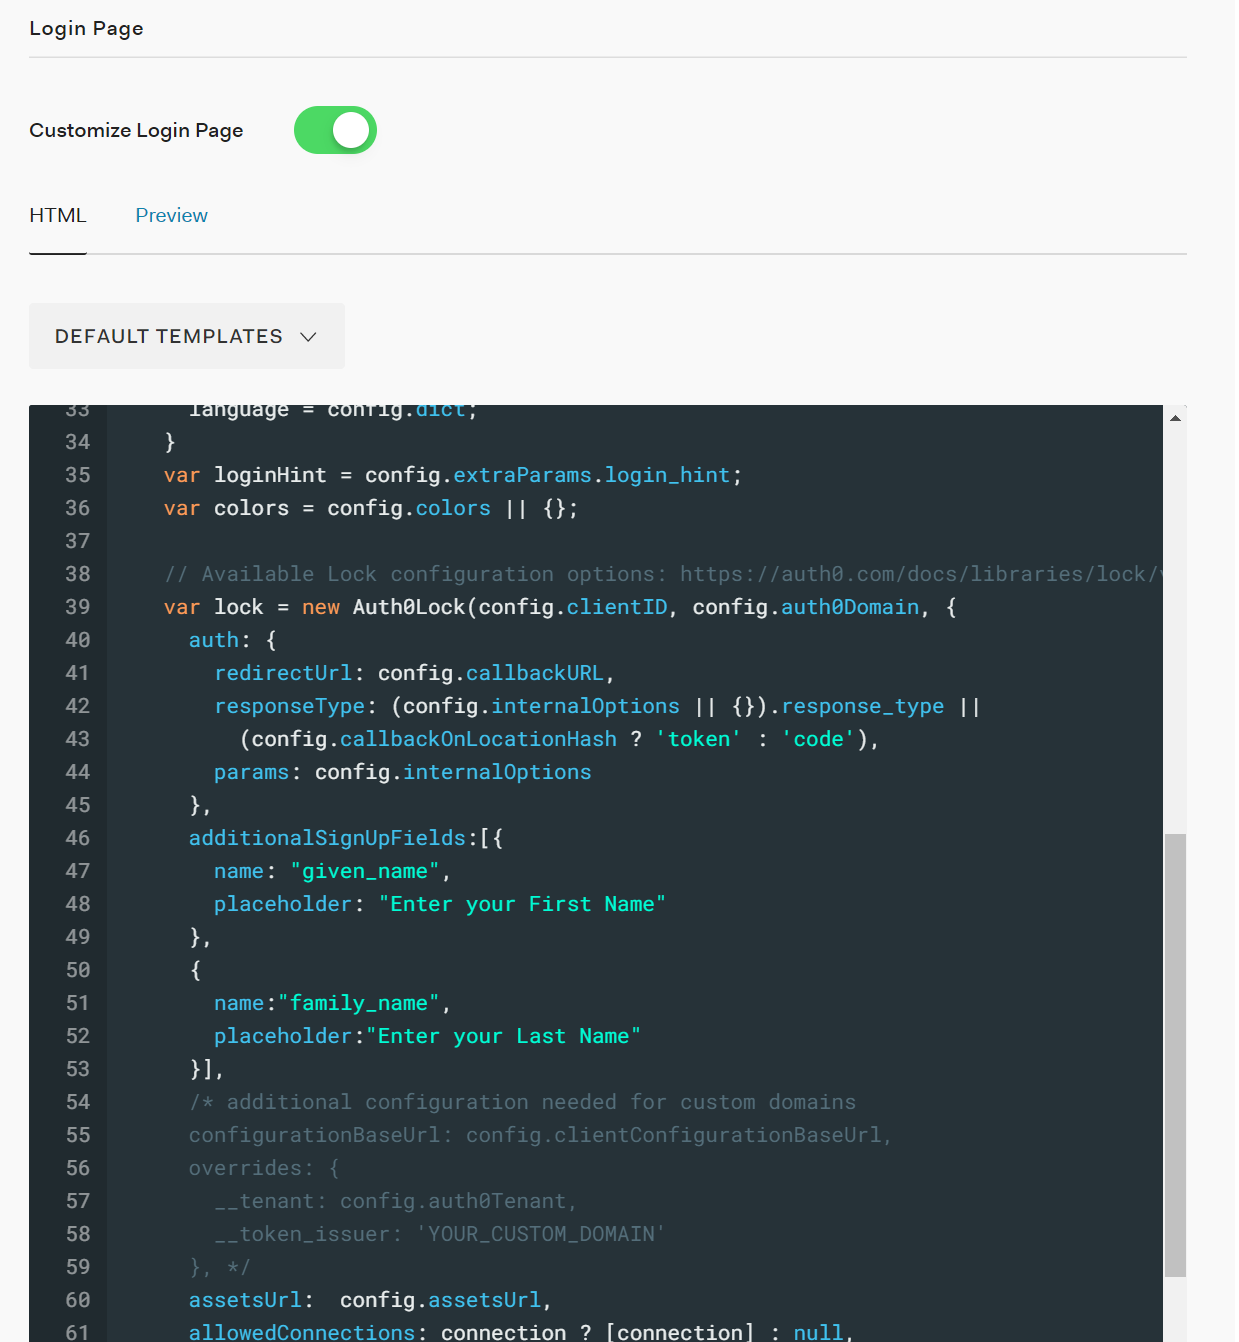
The final step is to customize the Sign Up page to require the user to enter values for First and Last name. The simplest way (that I found) to do this is to customize the login page in Auth0. Under Universal Login, click on the Login tab, toggle the "Customer Login Page" and select the "Lock" Default Template. This uses the Auth0Lock and for our purposes, we will be utilizing the additionalSignUpFields array configuration option. Add the following JSON snippet to the code block:
additionalSignUpFields:[{
  name: "given_name",
  placeholder: "Enter your First Name"
},
{
  name:"family_name",
  placeholder:"Enter your Last Name"
}],
And it should look something like this:
Click Save Changes and that should be it! Go back to Shopify's login page and you can test it out. To make sure it really works, log yourself out of Shopify, and when logging back in, click the Log in with Auth0 link you created earlier. You can go through the Sign Up workflow, which should require First name, Last name, Email, and Password.
In Production
Once you are ready to force all users to use Auth0 to login, the customers/login.liquid template can be completely replaced with a redirect to the auth0_login_url. All links to the login page can be replaced with direct links to the same setting. Also, all logout links need their url to be replaced with the auth0_logout_url setting.